> For the complete documentation index, see [llms.txt](https://docs.constellationnetwork.io/llms.txt). Markdown versions of documentation pages are available by appending `.md` to page URLs; this page is available as [Markdown](https://docs.constellationnetwork.io/metagraph-development/guides/deploy-a-metagraph/base-instance/connect-to-the-instance.md).
# Connect to the instance
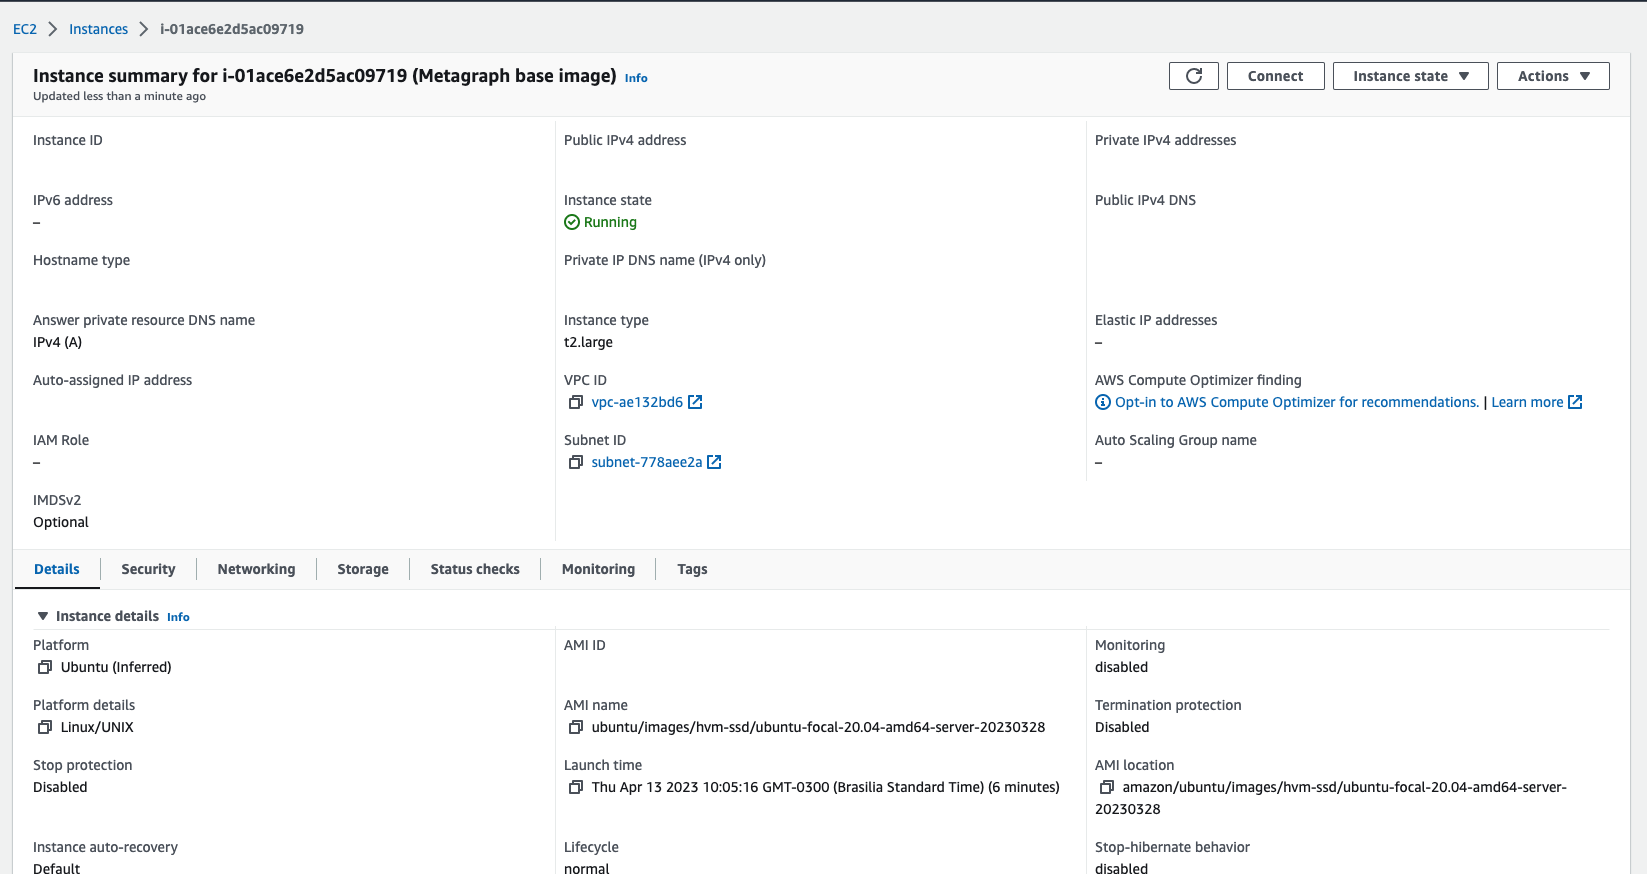
From your **`Instances`** page, click on your instance.
Then you should see something like this:
**Click on the `Connect` button at the top of the page.**[****](https://docs.constellationnetwork.io/sdk/guides/deploy-a-metagraph/base-instance/configuring-base-instance#click-on-the-connect-button-at-the-top-of-the-page)
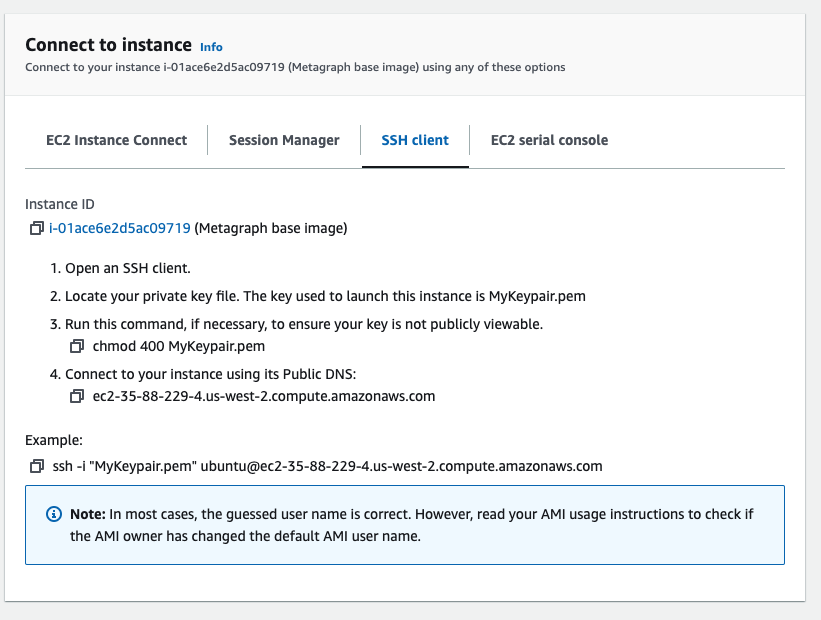
There are different ways to access the instance. In this example, we will connect using `ssh` using the file downloaded in the [Key pairs](/metagraph-development/guides/deploy-a-metagraph/key-pairs.md) step.
**Grant privileges to the SSH key**[****](https://docs.constellationnetwork.io/sdk/guides/deploy-a-metagraph/base-instance/configuring-base-instance#grant-privileges-to-the-ssh-key)
```
chmod 400 MyKeypair.pem
```
**Use the `ssh` command to connect to your instance**[****](https://docs.constellationnetwork.io/sdk/guides/deploy-a-metagraph/base-instance/configuring-base-instance#use-the-ssh-command-to-connect-to-your-instance)
```
ssh -i "MyKeypair.pem" ubuntu@your_instance.aws-region.compute.amazonaws.com
```
The name/IP of the instance will be different, but you can get the instructions on how to connect via ssh in the **`Connect to your instance`** section of the EC2 Console.
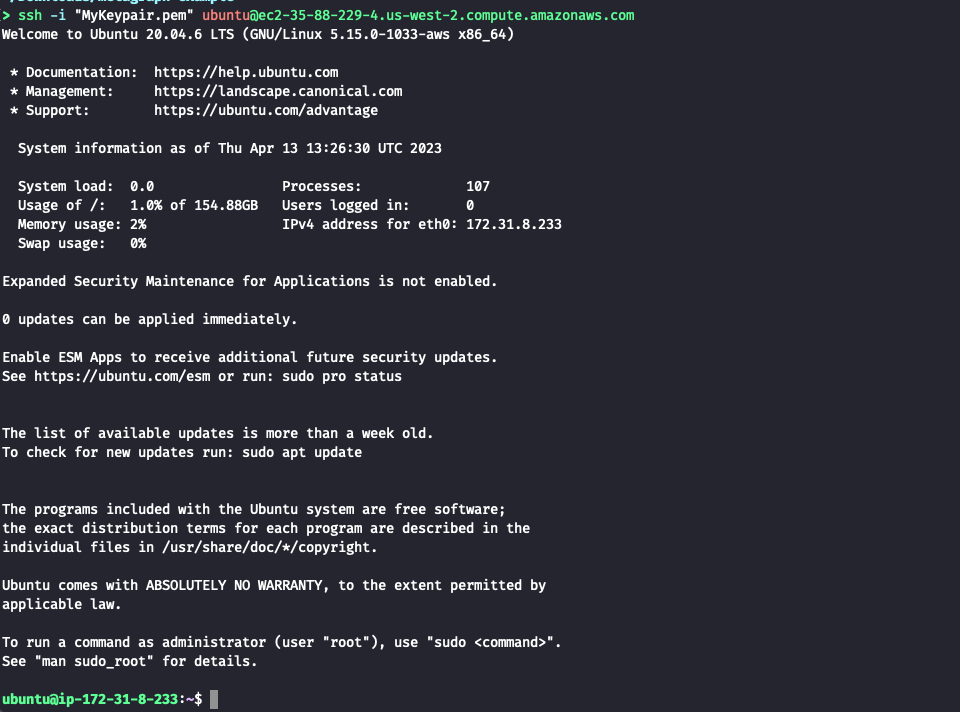
If asked to confirm the fingerprint of the instance, type **`yes`**.
Once connected, you should see a screen similar to this:
### Base instance setup[](https://docs.constellationnetwork.io/sdk/guides/deploy-a-metagraph/base-instance/configuring-base-instance#base-instance-setup)
Now, you can begin setting up your instance.
**Create base directory**[****](https://docs.constellationnetwork.io/sdk/guides/deploy-a-metagraph/base-instance/configuring-base-instance#create-base-directory)
Create a directory named **`code`** and navigate into it. This will be the base directory that we will work out of.
```
mkdir code
cd code/
```
**Create layer directories**[****](https://docs.constellationnetwork.io/sdk/guides/deploy-a-metagraph/base-instance/configuring-base-instance#create-layer-directories)
Create the following directories: `global-l0`, `metagraph-l0`, `currency-l1`, and `data-l1`. These will be the root directories for each of the layers.
```
mkdir global-l0
mkdir metagraph-l0
mkdir currency-l1
mkdir data-l1
```
**Add Tessellation utilities to each directory**[****](https://docs.constellationnetwork.io/sdk/guides/deploy-a-metagraph/base-instance/configuring-base-instance#add-tessellation-utilities-to-each-directory)
Replace "v2.2.0" with the latest version of Tessellation found here:
```
cd global-l0
wget https://github.com/Constellation-Labs/tessellation/releases/download/v2.2.0/cl-node.jar
wget https://github.com/Constellation-Labs/tessellation/releases/download/v2.2.0/cl-wallet.jar
wget https://github.com/Constellation-Labs/tessellation/releases/download/v2.2.0/cl-keytool.jar
cp cl-wallet.jar metagraph-l0/cl-wallet.jar
cp cl-wallet.jar currency-l1/cl-wallet.jar
cp cl-wallet.jar data-l1/cl-wallet.jar
cp cl-keytool.jar metagraph-l0/cl-keytool.jar
cp cl-keytool.jar currency-l1/cl-keytool.jar
cp cl-keytool.jar data-l1/cl-keytool.jar
```
**Install the necessary dependencies:**[****](https://docs.constellationnetwork.io/sdk/guides/deploy-a-metagraph/base-instance/configuring-base-instance#install-the-necessary-dependencies)
```
sudo apt-get update
sudo apt install openjdk-11-jdk -y
sudo apt-get install curl -y
sudo apt-get install wget -y
sudo apt-get install gnupg -y
sudo echo "deb https://repo.scala-sbt.org/scalasbt/debian all main" | sudo tee /etc/apt/sources.list.d/sbt.list
sudo echo "deb https://repo.scala-sbt.org/scalasbt/debian /" | sudo tee /etc/apt/sources.list.d/sbt_old.list
sudo curl -sL "https://keyserver.ubuntu.com/pks/lookup?op=get&search=0x2EE0EA64E40A89B84B2DF73499E82A75642AC823" | sudo apt-key add
sudo apt-get update
sudo apt-get install sbt -y
```
### Generate Metagraph JAR Files[](https://docs.constellationnetwork.io/sdk/guides/deploy-a-metagraph/base-instance/configuring-base-instance#generate-metagraph-jar-files)
For each of the metagraph layers, code from your project must be compiled into executable jar files. During local development with Euclid these files are compiled for you and stored within the `infra` directory of your project code. You can move these locally tested JAR files directly onto your base instance for deployment (recommended for this tutorial).
After ensuring that your project is ready for deployment, navigate to the following directory in your local Euclid codebase: `infra -> docker -> shared -> jars`
Within this directory, you will find the following JARs:
```
- `metagraph-l0.jar`
- `metagraph-l1-currency.jar`
- `metagraph-l1-data.jar`
```
Use `scp` to copy the files to your metagraph layer directories:
```
scp -i "MyKeypair.pem" your_jar_directory/metagraph-l0.jar ubuntu@ec2-your-ip.your-region.compute.amazonaws.com:code/metagraph-l0/metagraph-l0.jar
scp -i "MyKeypair.pem" your_jar_directory/metagraph-l1-currency.jar ubuntu@ec2-your-ip.your-region.compute.amazonaws.com:code/currency-l1/currency-l1.jar
scp -i "MyKeypair.pem" your_jar_directory/metagraph-l1-data.jar ubuntu@ec2-your-ip.your-region.compute.amazonaws.com:code/data-l1/data-l1.jar
```
**Alternative Option**[****](https://docs.constellationnetwork.io/sdk/guides/deploy-a-metagraph/base-instance/configuring-base-instance#alternative-option)
Alternatively, you could choose to generate the JARs on the base instance itself. If you choose that route, you can follow the steps in the following guide.
[Generating JARs on Base Instance](#generate-metagraph-jar-files)
### Setting up the Genesis File[](https://docs.constellationnetwork.io/sdk/guides/deploy-a-metagraph/base-instance/configuring-base-instance#setting-up-the-genesis-file)
The genesis file is a configuration file that sets initial token balances on your metagraph at launch, or genesis. This allows your project to start with any configuration of wallet balances you choose, which will only later be updated through token transactions and rewards distributions.
#### Genesis file[](https://docs.constellationnetwork.io/sdk/guides/deploy-a-metagraph/base-instance/configuring-base-instance#genesis-file)
If you already have your genesis file used for testing on Euclid, you can upload the file here.
```
scp -i "MyKeypair.pem" your_genesis_file.csv ubuntu@ec2-your-ip.your-region.compute.amazonaws.com:code/metagraph-l0/genesis.csv
```
#### Generating metagraphID[](https://docs.constellationnetwork.io/sdk/guides/deploy-a-metagraph/base-instance/configuring-base-instance#generating-metagraphid)
Before connecting your metagraph to the network, we will generate its' ID and save the output locally. This ID is a unique key used by the Global L0 store state about your metagraph.
**info**
When deploying to MainNet, your metagraphID must be added to the metagraph seedlist before you will be able to connect. Provide the metagraphID generated below to the Constellation team to be added to the seedlist.
IntegrationNet does not have a metagraph seedlist so you can connect easily and regenerate your metagraphID if needed during testing.
**Generate your metagraphID**[****](https://docs.constellationnetwork.io/sdk/guides/deploy-a-metagraph/base-instance/configuring-base-instance#generate-your-metagraphid)
```
cd ~/code/metagraph-l0
export CL_KEYSTORE=test.p12
export CL_KEYALIAS=test
export CL_PASSWORD=test
export CL_PUBLIC_HTTP_PORT=9100
export CL_P2P_HTTP_PORT=9101
export CL_CLI_HTTP_PORT=9102
export CL_GLOBAL_L0_PEER_HTTP_HOST=localhost
export CL_GLOBAL_L0_PEER_HTTP_PORT=9000
export CL_GLOBAL_L0_PEER_ID=e2f4496e5872682d7a55aa06e507a58e96b5d48a5286bfdff7ed780fa464d9e789b2760ecd840f4cb3ee6e1c1d81b2ee844c88dbebf149b1084b7313eb680714
export CL_APP_ENV=integrationnet
java -jar cl-keytool.jar generate
nohup java -jar metagraph-l0.jar create-genesis genesis.csv > metagraph-l0.log 2>&1 &
rm test.p12
```
**View Genesis Output**[****](https://docs.constellationnetwork.io/sdk/guides/deploy-a-metagraph/base-instance/configuring-base-instance#view-genesis-output)
You will find the following files in your directory:
* `genesis.snapshot`
* `genesis.address`
The `genesis.address` file contains your metagraphID, which should resemble a DAG address: `DAG...`. The `genesis.snapshot` file contains snapshot zero of your metagraph which will be used when connecting to the network for the first time.
**Your base instance is now fully configured**[****](https://docs.constellationnetwork.io/sdk/guides/deploy-a-metagraph/base-instance/configuring-base-instance#your-base-instance-is-now-fully-configured)
The following sections will cover creating each EC2 instance from this base instance and configuring each individually. You can skip ahead to the [Generating AMI](/metagraph-development/guides/deploy-a-metagraph/base-instance/generating-ami-image-from-base-instance.md) section.
---
# Agent Instructions
This documentation is published with GitBook. GitBook is the documentation platform designed so that both humans and AI agents can read, navigate, and reason over technical content effectively. Learn more at gitbook.com.
## Querying This Documentation
If you need additional information that is not directly available in this page, you can query the documentation dynamically by asking a question.
Perform an HTTP GET request on the current page URL with the `ask` query parameter:
```
GET https://docs.constellationnetwork.io/metagraph-development/guides/deploy-a-metagraph/base-instance/connect-to-the-instance.md?ask=
```
The question should be specific, self-contained, and written in natural language.
The response will contain a direct answer to the question and relevant excerpts and sources from the documentation.
Use this mechanism when the answer is not explicitly present in the current page, you need clarification or additional context, or you want to retrieve related documentation sections.