Setup Firewall
Google Cloud Platform (GCP) Firewall
We now will go through the steps required to lock down our new Google Cloud Platform instance.
We will setup the instance's firewall SG to only allow inbound connections necessary for our Node to operate properly.
Our outbound rules will be setup to only allow connections that were initiated from the instance.
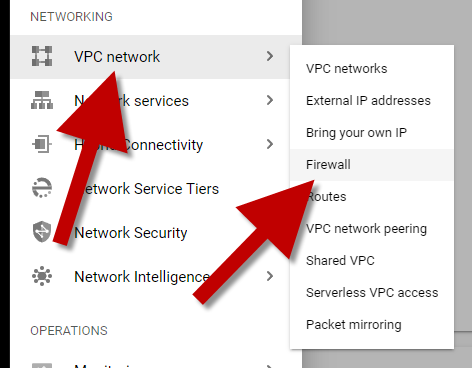
VPC NETWORK
From the left main panel, scroll down to VPC Network ➡️ Firewall.
info
If necessary click on the 三 to open the main panel
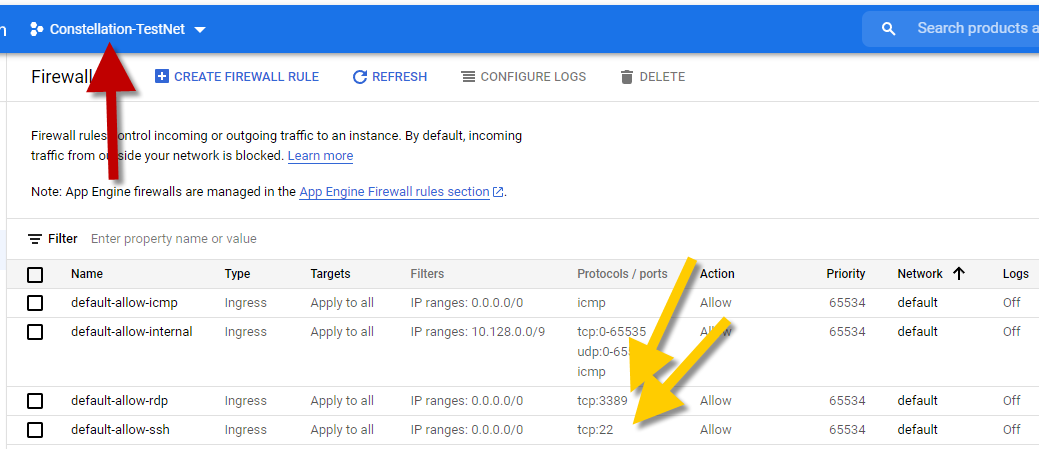
From the top you should notice we are inside our Project
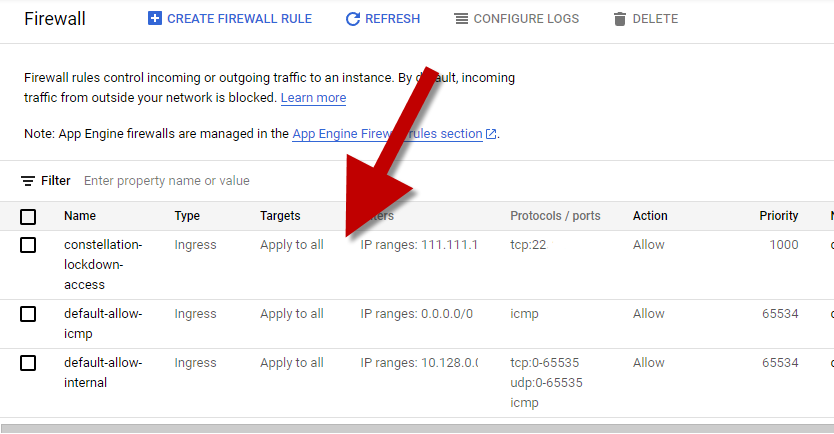
You will also notice we have some default rules.
- Wide open access for
SSH - Wide open access for
RDP
danger
You are dealing with crypto, so you want to have some tight security. You are in charge of your own DeFi here so if something goes wrong, no one is going to be able to help you.
info
This will affect your ability to access your Node from anywhere, but security needs to be taken into consideration when dealing with finances.
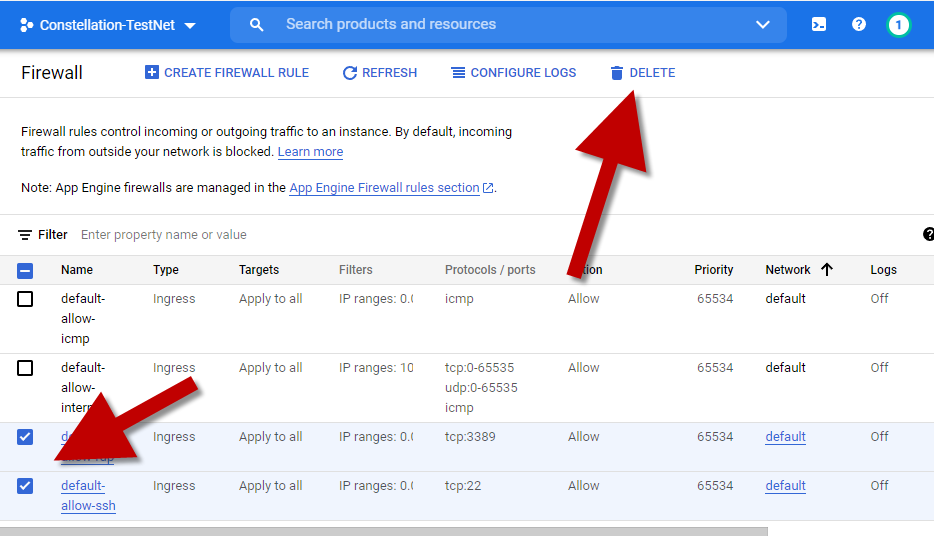
Select the two default rules for SSH and RDP. Click the DELETE button to clean up these unwanted open rules.
VERY IMPORTANT FOR MAINNET 2.0 LAUNCH
These documents reference creating a single layer 0 or metagraph. For the launch of MainNet 2.0, you will installing a DUAL layer - layer0 and layer1 - validator Node. You will need to add some extra firewall rules to accommodate this initial requirement. Please refer to the end of this documentation for these additions. The YouTube Series does not cover these extra rules.
NEW RULES
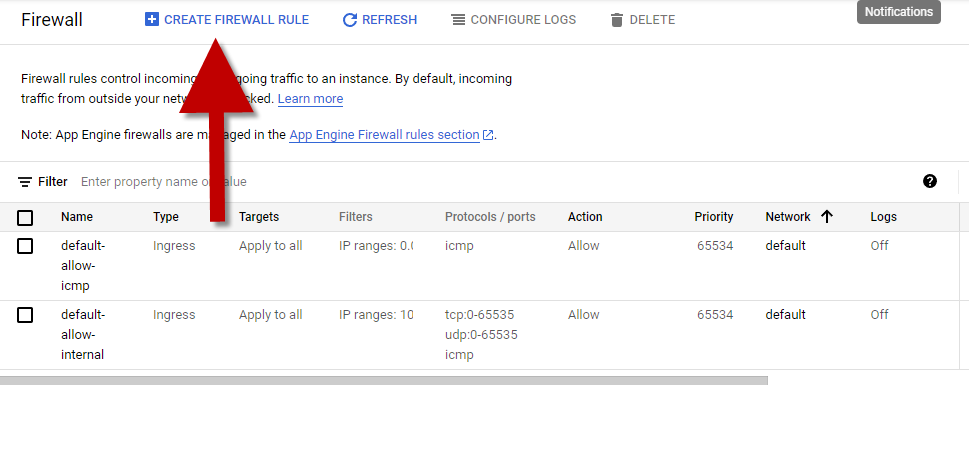
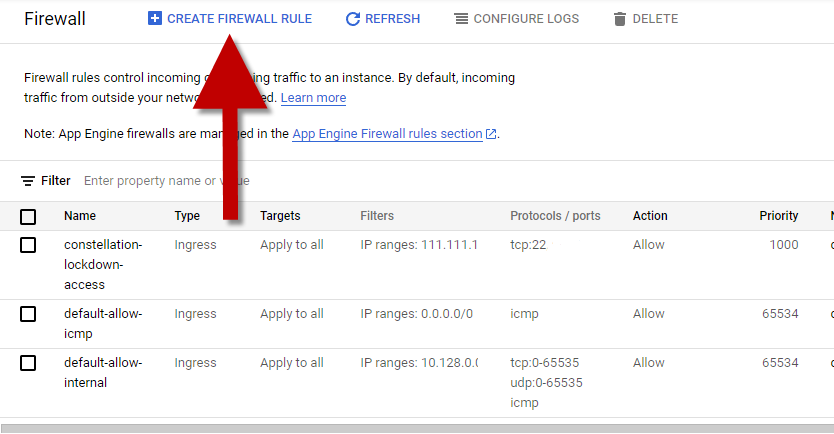
- Click on the
CREATE FIREWALL RULEoption.
Now comes a little harder section. But, we can get through it!
Click here to get redirected to a website (https://www.whatipmyip.com) that will identify your local IP address for you. Mark this IP address down. It is an important IP to remember.
You will use this IP address (your local IP address) as your Source for the both ports 22.
UNDERSTAND
This is going to restrict access to your Node from this location only. If you want access into your node from other locations (like roaming on your mobile device), you will need to create a more complex rule here (out of scope of this document).
IMPORTANT
The less restrictive your access, the more vulnerable your Node becomes.
Let's walk through the two Inbound Rules that we will need.
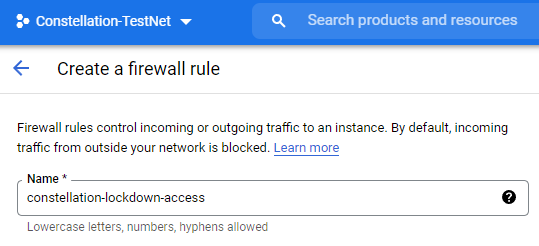
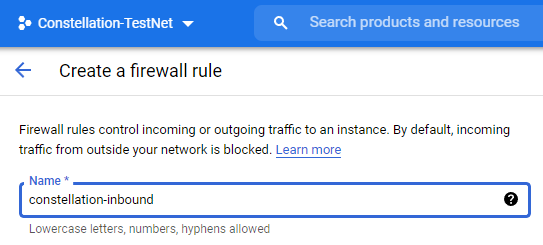
NAME
- Give our first rule a name.
ACCOUNT
- Assign this rule to our Specific service account.
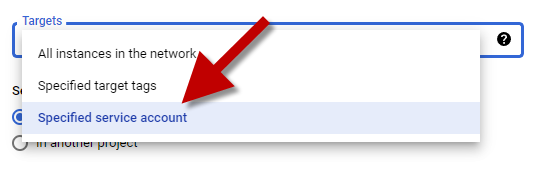
SERVICE ACCOUNT
- Select
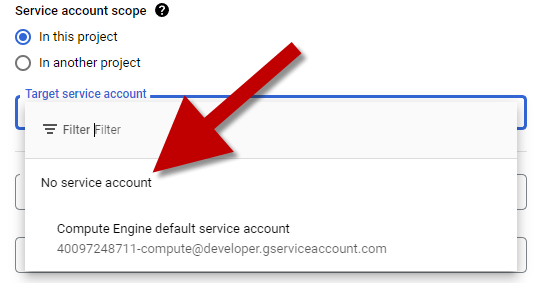
In this project - We don't need a service account so we will choose
No service account
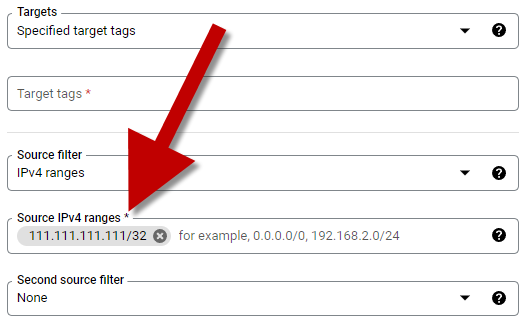
IP ADDRESS
Enter in our IP address that we retrieved from whatismyip.com
Add the
/32to the ending
danger
Do not use 113.113.113.113/32, this is just an example
- Add our SSH port
22rule back into our rule set, but this time lock it down to only allow our local IP inbound.
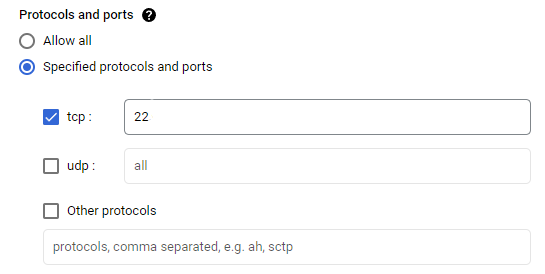
All the other options on this Create Firewall Rule section should be left as is, no need to alter them unless you are an advanced user and want to update elements to suit your needs.
- Click on
CREATE

VERIFY SSH RULE
NEW RULE
Now, go through the exact same process as the 👆 rule for our next rule.
- Click on the
CREATE FIREWALL RULEoption
- Add a name to the our firewall rule
Let's assign this rule to our Specified service account.

- Select
In this project - We don't need a Service Account, so we will choose
No service account

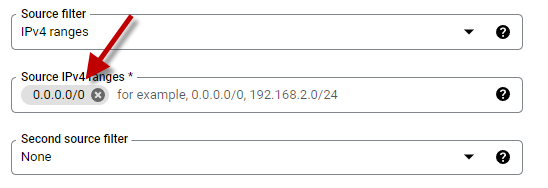
We will tell our rule to let anything access these ports from the internet. Add /0 to the ending of 0.0.0.0.
Example: 0.0.0.0/0
- Choose the Specified protocols and
portsoption - Check the
tcp:box - Enter in
9000followed by a-(dash) and then9001(no spaces)

All the other options on this Create Firewall Rule section should be left as is, no need to alter them unless you are an advanced user and want to update elements to suit your needs.
- Click on
CREATE
MAINNET 2.0 LAUNCH REQUIREMENT
It is highly recommended that you use nodectl to install and control/admin your Node.
Please add to your firewall configuration ports 9010-9011 to allow access to your MainNet 2.0 Validator Node's Layer1 connection. To accomplish this, repeat the exact same steps you used to open up ports 9000-9001.
VERIFY ALL OUR RULES
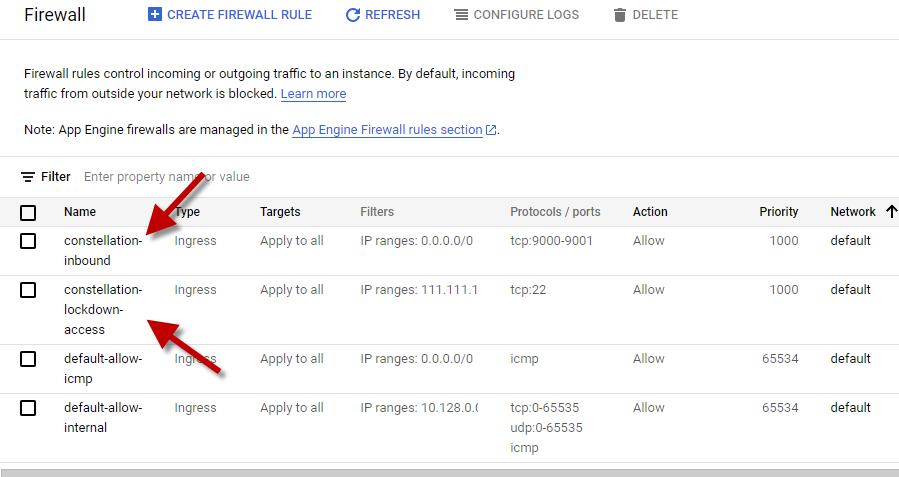
Our firewall security group is now properly setup to work with your future Node. Congrats!